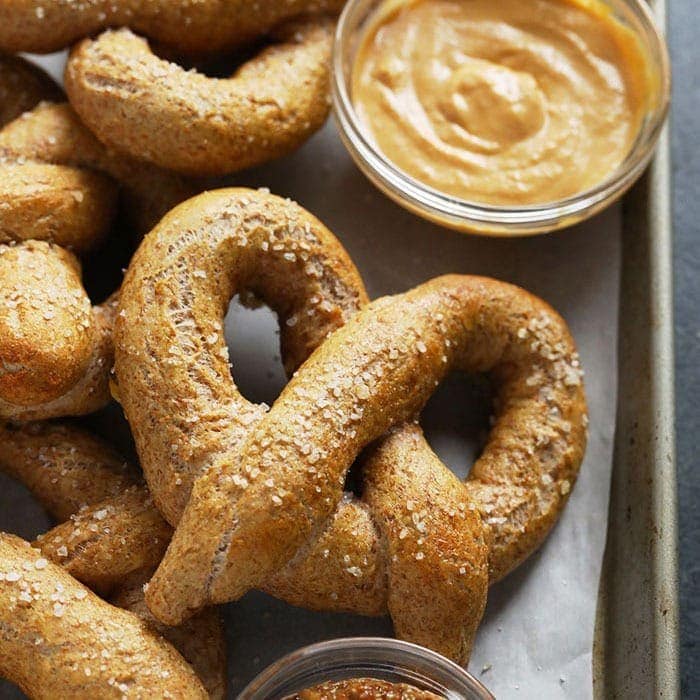
Whip Up Healthy Soft Pretzels: Your Easy Homemade Recipe in Just 1 Hour
Craving the warm, chewy deliciousness of a classic soft pretzel, but want to skip the greasy food court and opt for a healthier alternative? You're in luck! This comprehensive guide will walk you through an incredibly simple and quick healthy soft pretzel recipe that you can whip up from scratch in about an hour. Forget the store-bought stuff; we're about to unlock the secrets to making homemade pretzels that are not only ridiculously easy and insanely delicious but also pack a healthier punch.
Our recipe transforms basic kitchen staples into soft, doughy pretzels with a hint of sweetness and that satisfying exterior crunch. The best part? We've incorporated smart swaps to make these treats a touch healthier without compromising on the irresistible flavor or texture you love. Get ready to impress your taste buds and your family with this surprisingly simple baking adventure!
Why Make Your Own Healthy Soft Pretzels?
Beyond the sheer joy of fresh-baked goods, there are compelling reasons to embrace a homemade homemade healthy soft pretzels guide. When you make them yourself, you control every ingredient, ensuring a snack free from unnecessary preservatives, excessive sodium, or artificial flavors often found in commercial versions. This recipe, in particular, leverages a blend of white and whole wheat flour to boost fiber content, offering a more satisfying and nutrient-dense snack.
Many traditional pretzels can be calorie bombs, especially with added butter and toppings. Our approach focuses on creating a flavorful, substantial snack that aligns with a healthy lifestyle. For instance, some variations of healthy pretzels can deliver an impressive 25 grams of protein at just 280 calories, making them a fantastic post-workout treat or a satisfying mini-meal. Imagine enjoying that warm, fluffy goodness with the added benefit of knowing exactly what went into it. It’s a game-changer for anyone looking to enjoy their favorite comfort foods guilt-free.
Gathering Your Ingredients: The Foundation of Flavor
The beauty of this healthy soft pretzel recipe lies in its simplicity, requiring just a few fundamental ingredients that are likely already in your pantry. Each component plays a crucial role in developing the perfect pretzel texture and flavor:
- Warm Water (around 105°F): This is the lifeblood for your yeast. Too hot, and you kill it; too cold, and it won't activate. Think of it as a warm bath for happy yeast.
- Brown Sugar: Not just for sweetness, brown sugar provides the initial food source for the yeast, helping it to activate and grow. It also contributes to the pretzel's golden-brown crust and a subtle, rich flavor.
- Active Dry Yeast: The magic behind the pretzel's fluffy, airy interior. When activated, yeast produces carbon dioxide, causing the dough to rise.
- Melted Butter: Adds richness, tenderness, and flavor to the dough. Using unsalted butter allows you to control the overall salt content.
- All-Purpose Flour & Whole Wheat Flour: The star of our healthier twist! The combination offers the best of both worlds: the chewiness and workability of all-purpose flour, balanced with the added fiber, nutrients, and hearty texture of whole wheat flour. This blend ensures a delicious and wholesome result.
- Salt: Essential for flavor, salt also helps control yeast activity and strengthens the gluten structure in the dough.
Activating Your Yeast: The First Step to Success
The first step sets the stage for success. In the bottom of your stand mixer bowl (or a large mixing bowl if kneading by hand), combine the warm water, brown sugar, and active dry yeast. Give it a gentle whisk to combine. Now, comes the waiting game. Let this mixture sit undisturbed for about 10-15 minutes. You'll soon notice a beautiful, foamy layer developing on the surface. This bubbly cap is a clear sign that your yeast is alive, well, and eagerly multiplying – ready to transform your flour into delectable pretzel dough!
The Dough-Making Process: From Sticky to Smooth
Once your yeast is happily active, it’s time to bring in the dry ingredients and create the dough that will become your delightful pretzels. This process is surprisingly straightforward, especially with the help of a stand mixer.
- Prepare Dry Ingredients: In a separate medium-sized bowl, whisk together the melted butter, all-purpose flour, whole wheat flour, and salt. Pre-mixing ensures that all these components are evenly distributed throughout the dough, preventing pockets of unmixed ingredients.
- Combine Wet and Dry: Attach the dough hook to your stand mixer. With the mixer set to low speed, gradually begin adding the dry ingredient mixture to the wet yeast mixture in the bowl. Add about a third of a cup at a time, allowing each addition to incorporate before adding more. This slow, steady incorporation is key. It gives the flour ample time to fully hydrate and develop gluten strands, which are crucial for giving your pretzels their signature chewy texture.
- Form the Dough: Continue adding flour and mixing on low speed until a soft, pliable dough forms. You’ll know it’s ready when it starts to pull away cleanly from the sides of the bowl and is no longer excessively sticky. The exact amount of flour needed can vary slightly depending on factors like the humidity in your kitchen, so trust your judgment and the dough's feel.
- Brief Knead and Rest: Once the dough reaches the right consistency, remove it from the stand mixer. Lightly flour your countertop and gently knead the dough for just a minute or two. This brief kneading further develops the gluten and helps to smooth out the dough. Shape it into a ball, place it on your lightly floured countertop, and cover it with a clean tea towel. Let it rest for a short 10 minutes. This crucial resting period allows the gluten to relax, making the dough much easier to roll out and shape in the next step.
Shaping and Resting: The Pretzel's Signature Form
With your dough relaxed and ready, it's time to give your pretzels their iconic shape. This part is surprisingly meditative and fun!
- Portion the Dough: After the 10-minute rest, divide your dough into 6 equal portions. For precision, you can use a kitchen scale, but eyeballing it works perfectly fine for perfectly imperfect homemade pretzels.
- Roll into Ropes: Take one portion of dough and, on a lightly floured surface, begin rolling it out into a long, thin rope. Aim for a length of approximately 20-25 inches and strive for consistent thickness throughout the entire rope. This consistency is important for even baking.
- Create the Pretzel Shape: Now for the classic pretzel twist! Fold the rope in half to create a 'U' shape. Take the two ends of the 'U' and twist them over each other twice. Then, bring those twisted ends down and press them gently into the bottom curve of the 'U' shape to secure them. Repeat this process for all remaining dough portions.
Once shaped, place your pretzels on a baking sheet lined with parchment paper.
The Pretzel Bath: Achieving That Golden Crust
While the reference context focuses on the dough, a truly classic soft pretzel requires one more crucial step before baking: the baking soda bath. This bath is what gives pretzels their distinct dark brown, slightly chewy crust and unique flavor, setting them apart from ordinary bread. Without it, your pretzels would simply be bread sticks!
- Prepare the Bath: Preheat your oven to 400°F (200°C). In a wide, shallow pot, bring about 8-10 cups of water to a rolling boil. Carefully add ½ cup of baking soda to the boiling water. Be cautious, as the mixture will foam up significantly.
- Dip the Pretzels: Using a slotted spoon or spatula, gently submerge one pretzel at a time into the boiling baking soda solution. Let it boil for about 20-30 seconds per side. Avoid overcrowding the pot.
- Drain and Transfer: Carefully remove the pretzel from the bath, allowing any excess liquid to drain off. Place the bathed pretzels back onto your parchment-lined baking sheet, leaving some space between them.
The baking soda creates an alkaline environment that speeds up the Maillard reaction during baking, responsible for the deep color and characteristic flavor.
Baking Your Perfect Pretzels
With your pretzels bathed and ready, the final step is to bake them to golden perfection. This quick bake will bring out their best!
- Egg Wash (Optional): For an extra shiny, golden-brown crust, you can brush the bathed pretzels with an egg wash (one egg whisked with a tablespoon of water) before baking. This also helps salt stick better.
- Salt (Optional): If desired, sprinkle coarse sea salt or pretzel salt over the wet pretzels immediately after the bath (or after the egg wash).
- Bake: Transfer the baking sheet to your preheated oven. Bake for 12-15 minutes, or until the pretzels are a deep golden brown. The exact timing can vary slightly depending on your oven and the thickness of your pretzels.
- Cool and Enjoy: Once baked, transfer the pretzels to a wire rack to cool slightly. They are best enjoyed warm, straight from the oven!
Beyond the Basics: Making Your Pretzels Even Healthier (and Tastier!)
This healthy soft pretzel recipe is a fantastic starting point, but you can always customize it further to suit your dietary needs and taste preferences. Here are a few ideas:
- Boost the Protein: For an even more satisfying snack, consider exploring recipes that incorporate protein. Some recipes, like High-Protein Healthy Soft Pretzels, might include ingredients like cottage cheese or a scoop of unflavored protein powder into the dough, significantly increasing their nutritional value without sacrificing flavor. These can be particularly great for post-workout recovery or a filling mid-day snack.
- Flour Variations: While our recipe uses a white and whole wheat blend, you could experiment with increasing the ratio of whole wheat flour for an even heartier, fiber-rich pretzel, or try other whole grain flours if you're an experienced baker.
- Savory Toppings: Beyond traditional pretzel salt, consider everything bagel seasoning, garlic powder, dried herbs like rosemary or oregano, or even a sprinkle of parmesan cheese before baking.
- Sweet Variations: Skip the salt and sprinkle cinnamon sugar on your warm pretzels. A drizzle of healthy chocolate sauce or a light glaze can turn them into a delightful dessert.
Conclusion
There you have it – a truly accessible and delicious healthy soft pretzel recipe that empowers you to create wholesome, satisfying snacks right in your own kitchen. Ditching the commercial versions for homemade means you're in control of the ingredients, the flavor, and the nutritional value. In about an hour, you can transform simple ingredients into warm, fluffy, and perfectly chewy pretzels that rival any you'd find in a mall food court. So, roll up your sleeves, activate that yeast, and get ready to enjoy the incredible taste and satisfaction of your very own homemade healthy soft pretzels!
